|
|
| Dropping your four cylinder engine |
HOW TO DROP YOUR FOUR CILINDER ENGINE - part 1
By Mark D'Bernardi
This engine drop was done on a 74 2.0. Some models may have slight differences.
A few general tips: I recommend always rethreading bolts and nuts into their original places after removing the part they're holding (once you remove the muffler, put all the bolts back into the heat exchanger flange).
That way you don't lose anything and you always know what goes where.
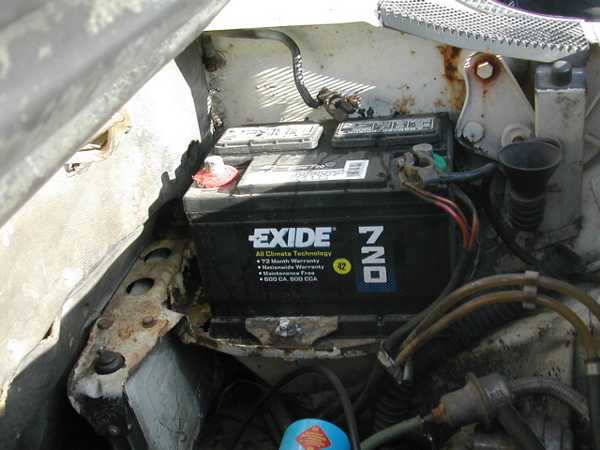
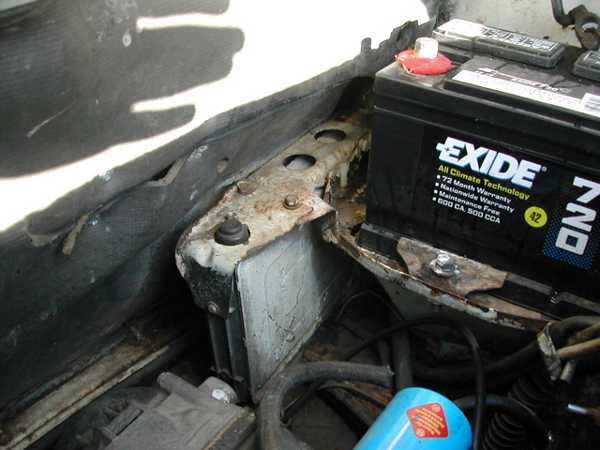
Start by disconnecting the battery. Negative side first! Separate the red wires from the black wire on the positive side. The black wire will be going with the engine, the red wires will be staying in the car.
If you battery looks like this (wet cell/non-sealed), replace it with a sealed battery (Orbital/Optima).
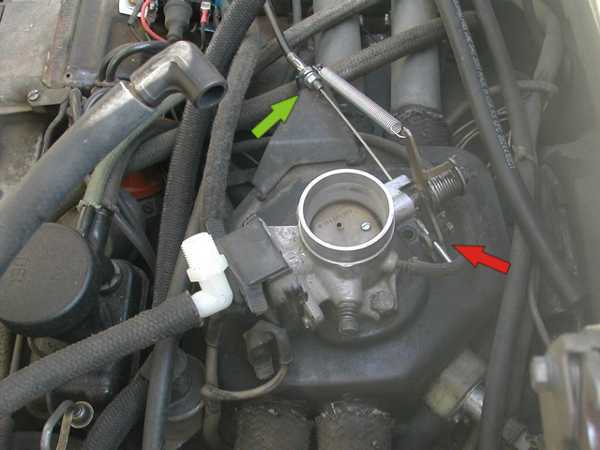
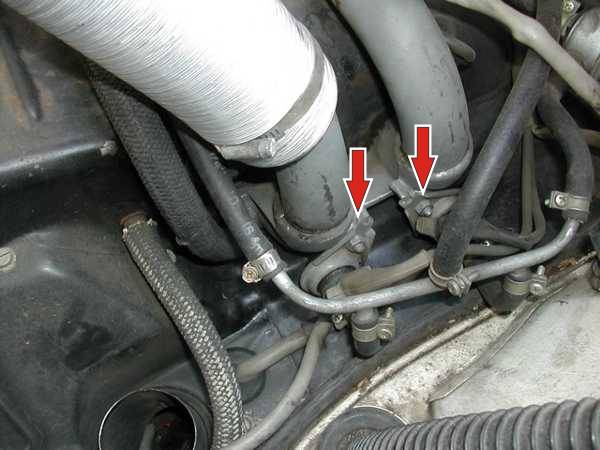
Remove the air cleaner box and disconnect the throttle cable. The throttle cable has a locking nut (10 mm wrench) indicated with a green arrow and a barrel nut (8 mm wrench) indicated with the red arrow.
Once you release the barrel nut it is very smart to pull it from the linkage and reconnect it to the cable. Barrel nuts have a nasty habit of disappearing.
Finally, push the cable down through the tin.
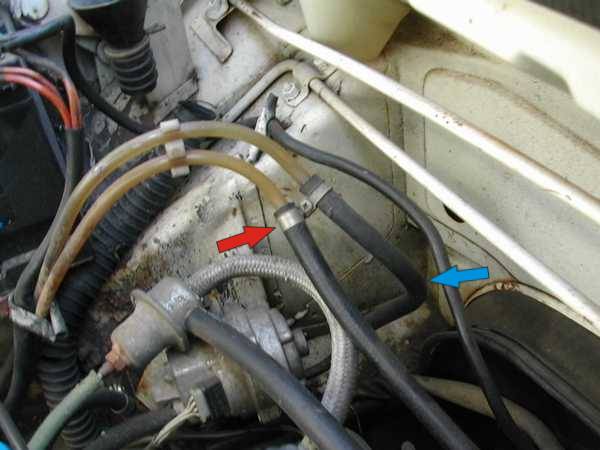
Disconnect the fuel lines.
Watch out for pressurized fuel. It can spray out if you're not careful.
The fuel line with the blue arrow should be disconnected at the fuel rail.
The fuel line with the red arrow should be disconnected at the plastic fuel line.
Once they're both disconnect, hook the plastic lines together so you don't accidentally spill fuel everywhere.
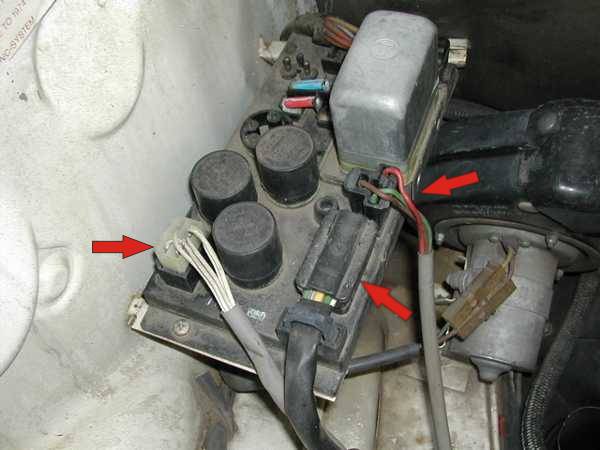
Take the cover off the relay board and pull the three connections indicated.
To protect your injectors and fuel hoses, remove the nuts (10 mm wrench) that hold the injectors in place.
This is a good time to inspect your injector seals.
Next detach the ECU from the battery tray by loosening the two mounting nuts (10 mm wrench).
There is a third mounting screw back behind the battery. It is usually loose, but could potentially be tight and keep you from being able to remove the ECU.
Once the bolts are loose (don't remove them) just pull the ECU towards the engine to detach it.
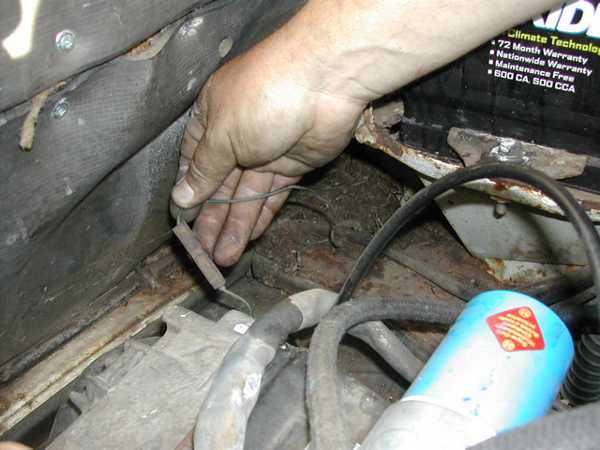
If your engine has an oil temp sensor installed this is the wire that feeds it.
Disconnect by pulling carefully on both the wires.
The plastic housing protects a standard spade connector. Sometimes moving your hand in a circular motion will help convince the connector to separate.
Remove the four hoses and one electrical connection from the deceleration valve (top) and the MPS (bottom).
The two green arrows indicate hoses that have already been removed in this picture.
The other end of the black hose (in this picture) connects to the air box and has therefor already been disconnected.
It can, optionally, be left connected.

Everything is done inside the engine bay. Raise the car onto ramps or stands.
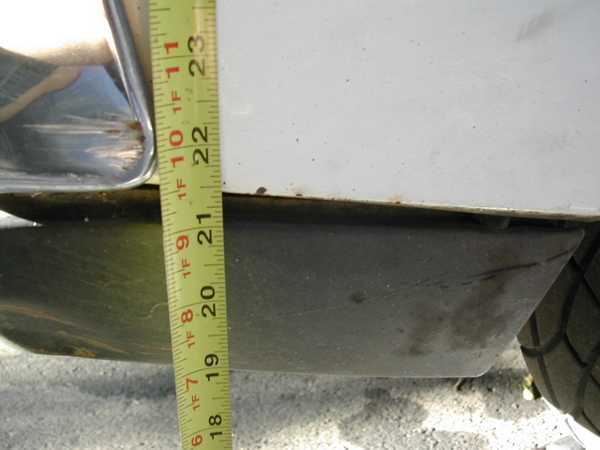
I use these ramps because I've found that they are the perfect height to pull the engine.
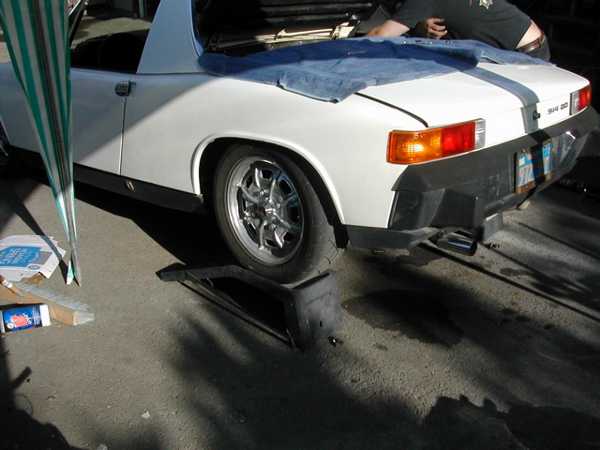
My ramps raise the back end of the car 21.5 inches off the ground.
Remove the rear valence to gain more clearance. It's held on with two bolts (8 mm wrench) in the fender wells and four(?) acccessed just underneath the bumper along the back.
go to part 2 »
|
|