|
|
|
Porsche, and the Porsche crest are registered trademarks of Dr. Ing. h.c. F. Porsche AG.
This site is not affiliated with Porsche in any way. Its only purpose is to provide an online forum for car enthusiasts. All other trademarks are property of their respective owners. |
|
|

  |

| whitey |
 Sep 24 2007, 10:18 PM Sep 24 2007, 10:18 PM
Post
#1
|
|
Member  Group: Members Posts: 146 Joined: 8-February 07 From: Coto de Caza Member No.: 7,508 |
I don't have a rack to get my car up on. Call me dumb...I can't figure out how to remove the front bumper...Help
Thanks, Dave |
   |

 
|
| John |
Sep 24 2007, 10:22 PM
Post
#2
|
|
member? what's a member? Group: Members Posts: 3,393 Joined: 30-January 04 From: Evansville, IN (SIRPCA) Member No.: 1,615 Region Association: None |
If it's an early car, jack the front end up and put it on stands. Remove the front wheels. In the wheel wells, there will be 2 bolts on each side that hold the front bumper on. Remove the bolts and the bumper will come off.
Later cars 75-76 are different. I don't know them. |
|
|
|
| whitey |
Sep 24 2007, 10:26 PM
Post
#3
|
|
Member Group: Members Posts: 146 Joined: 8-February 07 From: Coto de Caza Member No.: 7,508 |
Thanks, that makes sense.
Dave |
|
|
|
| Trevorg7 |
Sep 24 2007, 10:27 PM
Post
#4
|
|
Senior Member Group: Members Posts: 1,242 Joined: 7-December 04 From: Highland Village, TX Member No.: 3,241 Region Association: Southwest Region |
I've taken mine off with out jacking it up. Do one side at a time and turn the front wheels to access the nuts.
Good luck. T |
|
|
|
| Goober |
Sep 24 2007, 10:48 PM
Post
#5
|
|
Newbie Group: Members Posts: 5 Joined: 23-September 07 From: Nigeria Member No.: 8,145 |
QUOTE(Trevorg7 @ Sep 24 2007, 09:27 PM)  I've taken mine off with out jacking it up. Do one side at a time and turn the front wheels to access the nuts. Good luck. T (IMG:style_emoticons/default/agree.gif) Easy to do... |
|
|
|
| bigkensteele |
Sep 24 2007, 11:07 PM
Post
#6
|
|
Major Member Group: Members Posts: 2,197 Joined: 30-August 04 From: Cincinnati, OH Member No.: 2,660 Region Association: South East States |
Related HiJack
Does anyone have a method or trick to locate where the holes should be drilled when backdating a car from late bumpers to early? Are there still stampings on the sheetmetal where the early holes were on the later cars? I have all the parts ready and waiting. All I need now is the time and advice on where to drill. Thanks, Ken |
|
|
|
| Rand |
Sep 25 2007, 01:02 AM
Post
#7
|
|
Cross Member Group: Members Posts: 7,409 Joined: 8-February 05 From: OR Member No.: 3,573 Region Association: None |
QUOTE(Goober @ Sep 24 2007, 09:48 PM) QUOTE(Trevorg7 @ Sep 24 2007, 09:27 PM) I've taken mine off with out jacking it up. Do one side at a time and turn the front wheels to access the nuts. (IMG:style_emoticons/default/agree.gif) Easy to do... (IMG:style_emoticons/default/agree.gif) Yup. I backdated mine without jacking or removing wheels. QUOTE Does anyone have a method or trick to locate where the holes should be drilled when backdating a car from late bumpers to early? There are standard locations. Maybe someone will post those. With my car and bumpers, I needed to mark my own... I put heavy paper tape over the areas the holes needed to go, then lined up my new bumper and pressed it against the car. The studs marked the paper tape and I drilled there. Pulled off the tape and the bumper went right in. But my fiberglass bumpers have studs... Don't know what yours are like. Didn't take a pic when I did the front, but you can see the tape/marks in this shot of the rear... Attached image(s) 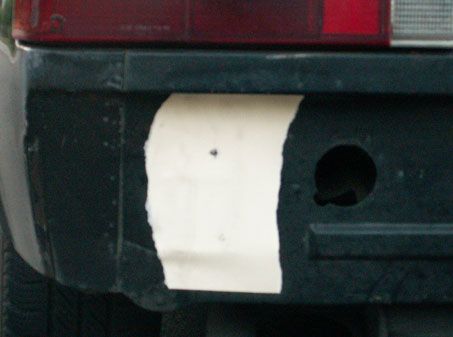
|
|
|
|
| PeeGreen 914 |
Sep 25 2007, 01:08 AM
Post
#8
|
|
Just when you think you're done...wait, there is more..lol Group: Members Posts: 10,219 Joined: 21-September 06 From: Seattle, WA... actually Everett Member No.: 6,884 Region Association: Pacific Northwest |
(IMG:style_emoticons/default/agree.gif) Why not? everyone else does (IMG:style_emoticons/default/av-943.gif)
|
|
|
|
| Chuck |
Sep 25 2007, 10:07 AM
Post
#9
|
|
What it eventually will look like . . . . Group: Members Posts: 355 Joined: 29-March 07 From: Maple Grove, MN Member No.: 7,632 Region Association: Northstar Region |
And if the bolts are pretty rusted, as is most likely the case, be careful when removing them as they are likely to break before turning loose. It is cramped in the wheel well and your fingers can and will smack into things and break when that bolt snaps off. Ask me how I know.
On a more serious note, you may need to poke around in there with a light and a screwdriver to remove undercoating before locating the bolts. It also helps if you put some jackstands under the bumper or have a helper support it while removing the bolts so that they don't bind. |
|
|
|
| rigglet |
Sep 25 2007, 01:29 PM
Post
#10
|
|
Member Group: Members Posts: 149 Joined: 28-November 06 From: Westfield, Indiana Member No.: 7,272 Region Association: Upper MidWest |
Related to this topic...
Anyone have pictures of the front of their car with the bumpers removed. I have a rust problem where my bumpers bolt to the car (early bumpers on an early car). I will need to fabricate some sheet metal to replace this as well as new bumper supports, but it's in pretty bad shape and I don't know what it looked like prior to the rust. Thanks all! |
|
|
|
| So.Cal.914 |
Sep 25 2007, 01:37 PM
Post
#11
|
|
"...And it has a front trunk too." Group: Members Posts: 6,588 Joined: 15-February 04 From: Low Desert, CA./ Hills of N.J. Member No.: 1,658 Region Association: None |
Craig, Boxstr (SP?)(camp 914) had a real nice write up on this, I...I see a PM in your future.
|
|
|
|
| boxstr |
Sep 25 2007, 09:23 PM
Post
#12
|
|
MEMBER:PACIFIC NORTHWEST REGION Group: Members Posts: 7,522 Joined: 25-December 02 From: OREGON Member No.: 12 Region Association: Pacific Northwest |
Okay here come some pics of the front and rear bumper holes.
Use studs on your chrome bumpers. Get threaded studs for them rather than use bolts. It is so much easier to install the bumpers. Use the dogbones as a measuring guide for the distance between the top and bottom holes. This goes for the front and rear. Attached image(s) 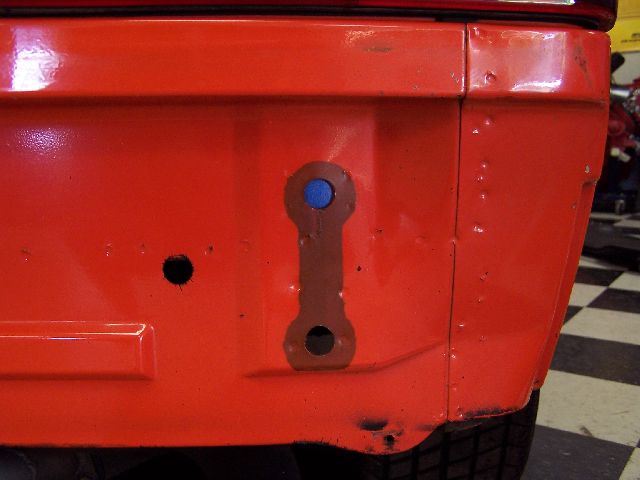 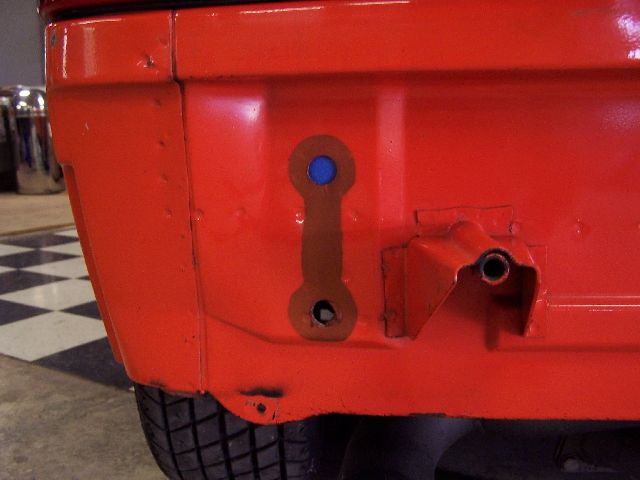 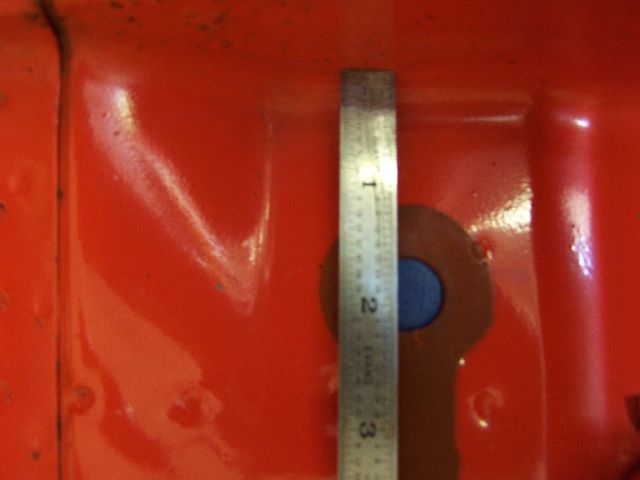 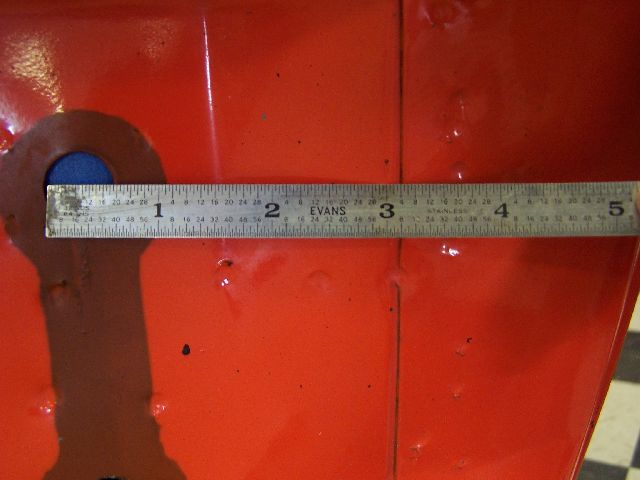 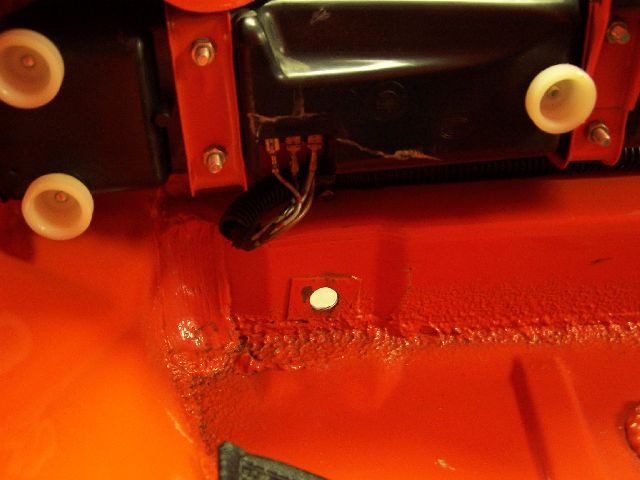 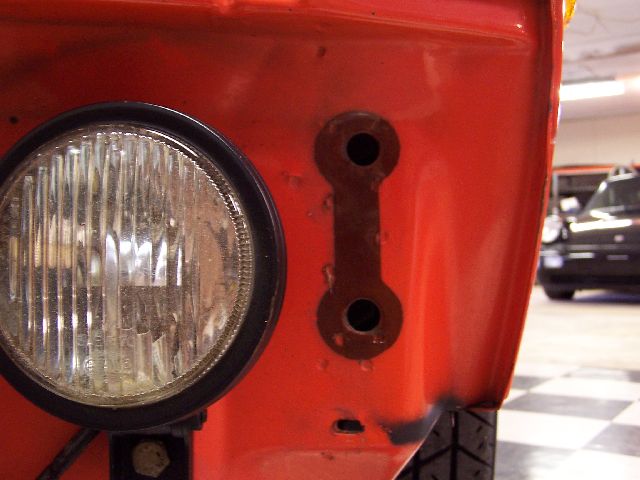 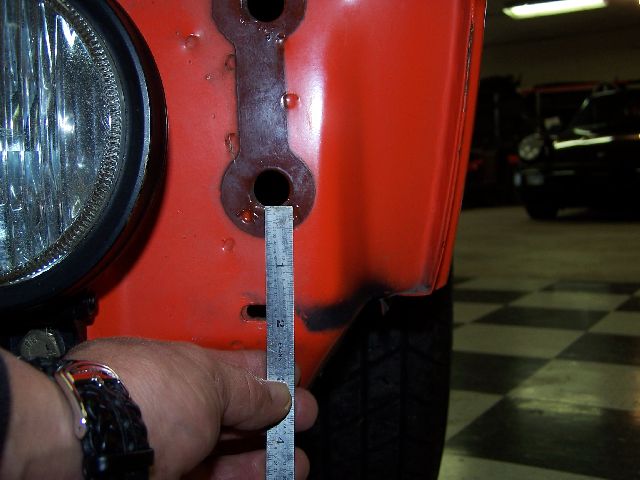 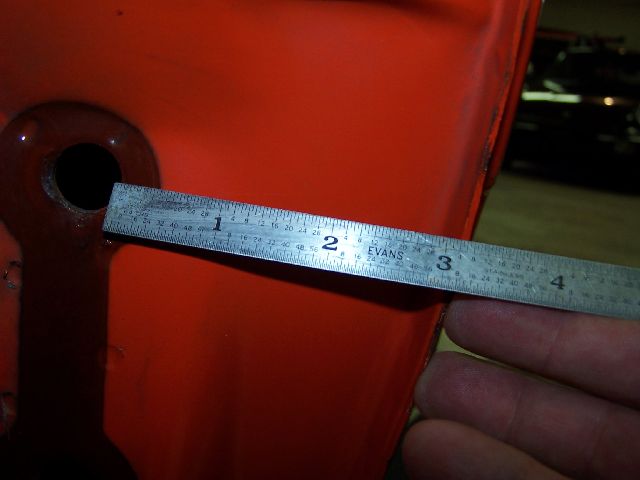
|
|
|
|
| boxstr |
Sep 25 2007, 09:26 PM
Post
#13
|
|
MEMBER:PACIFIC NORTHWEST REGION Group: Members Posts: 7,522 Joined: 25-December 02 From: OREGON Member No.: 12 Region Association: Pacific Northwest |
Here are somemore...
Attached image(s) 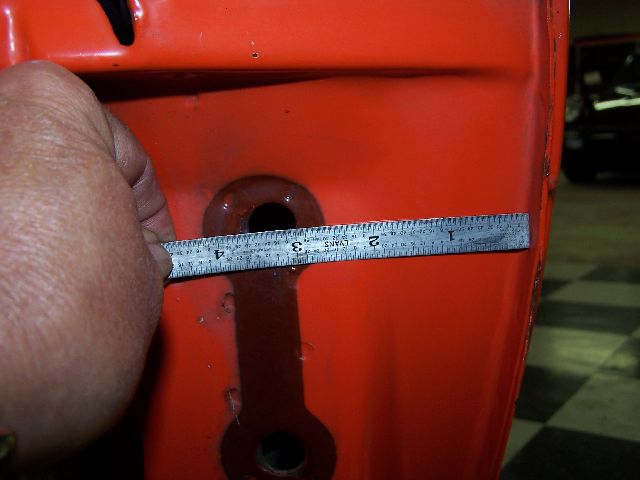 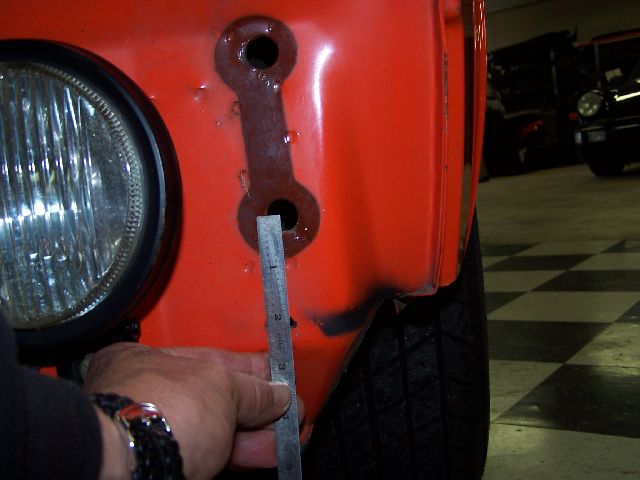 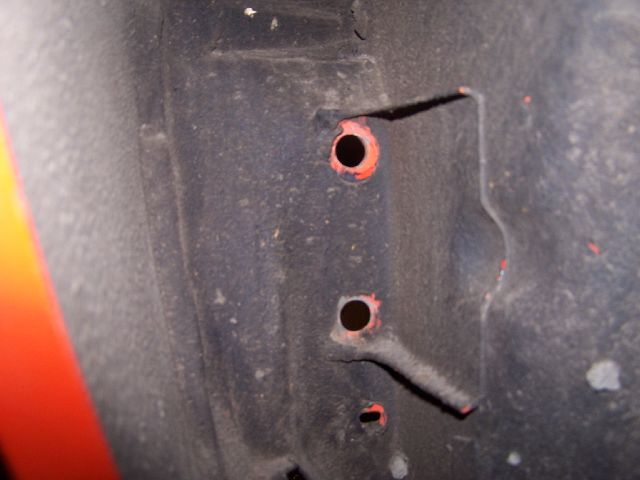 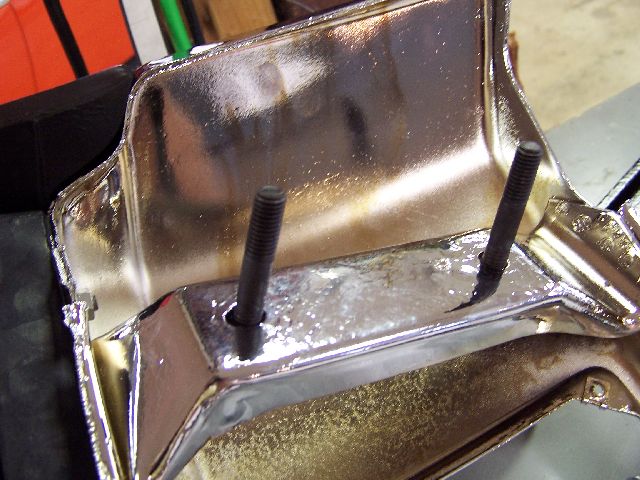 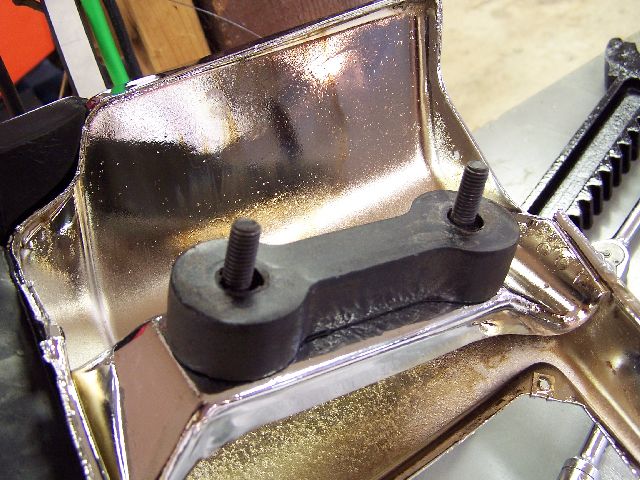
|
|
|
|
| boxstr |
Sep 25 2007, 09:27 PM
Post
#14
|
|
MEMBER:PACIFIC NORTHWEST REGION Group: Members Posts: 7,522 Joined: 25-December 02 From: OREGON Member No.: 12 Region Association: Pacific Northwest |
Okay that should do it for tonights lesson.
CCLINWELCOMEBACKKOTTER |
|
|
|
| rigglet |
Sep 26 2007, 05:14 AM
Post
#15
|
|
Member Group: Members Posts: 149 Joined: 28-November 06 From: Westfield, Indiana Member No.: 7,272 Region Association: Upper MidWest |
That is exactly what I needed! Thanks boxstr!!
|
|
|
|
| tommyj |
Jun 25 2022, 03:53 PM
Post
#16
|
|
Newbie Group: Members Posts: 2 Joined: 17-October 13 From: Stroudsburg Pa. Member No.: 16,522 Region Association: None |
Thank you for the post . It might be old but it just helped a guy out who was trying to adjust the pull for the front trunk and tighten it with slack in the cable.. probably not alone !!! Thanks
|
|
|
|
| Montreal914 |
Jun 26 2022, 11:22 AM
Post
#17
|
|
Senior Member Group: Members Posts: 1,541 Joined: 8-August 10 From: Claremont, CA Member No.: 12,023 Region Association: Southern California |
QUOTE(boxstr @ Sep 25 2007, 08:23 PM) Use studs on your chrome bumpers. Get threaded studs for them rather than use bolts. It is so much easier to install the bumpers. Excellent idea! Thank you for the tip! (IMG:style_emoticons/default/smile.gif) |
|
|
|
| 914sgofast2 |
Jun 26 2022, 09:38 PM
Post
#18
|
|
Senior Member Group: Members Posts: 613 Joined: 10-May 13 From: El Dorado Hills, CA Member No.: 15,855 Region Association: None |
Do yourself a big favor and install studs in the front bumper instead of using bolts. It makes removing/reinstalling the front bumper a one person job. You can use the same size studs as are used in the cylinder heads to hold the exhaust manifolds to the heads.Best thing I ever did.
|
|
|
|
|
1 User(s) are reading this topic (1 Guests and 0 Anonymous Users)
0 Members:

|
Lo-Fi Version | Time is now: 25th April 2024 - 06:21 PM |
Invision Power Board
v9.1.4 © 2024 IPS, Inc.